Tuesday, November 21, 2006

texture


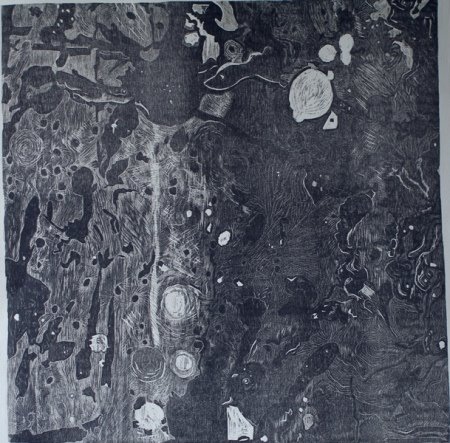
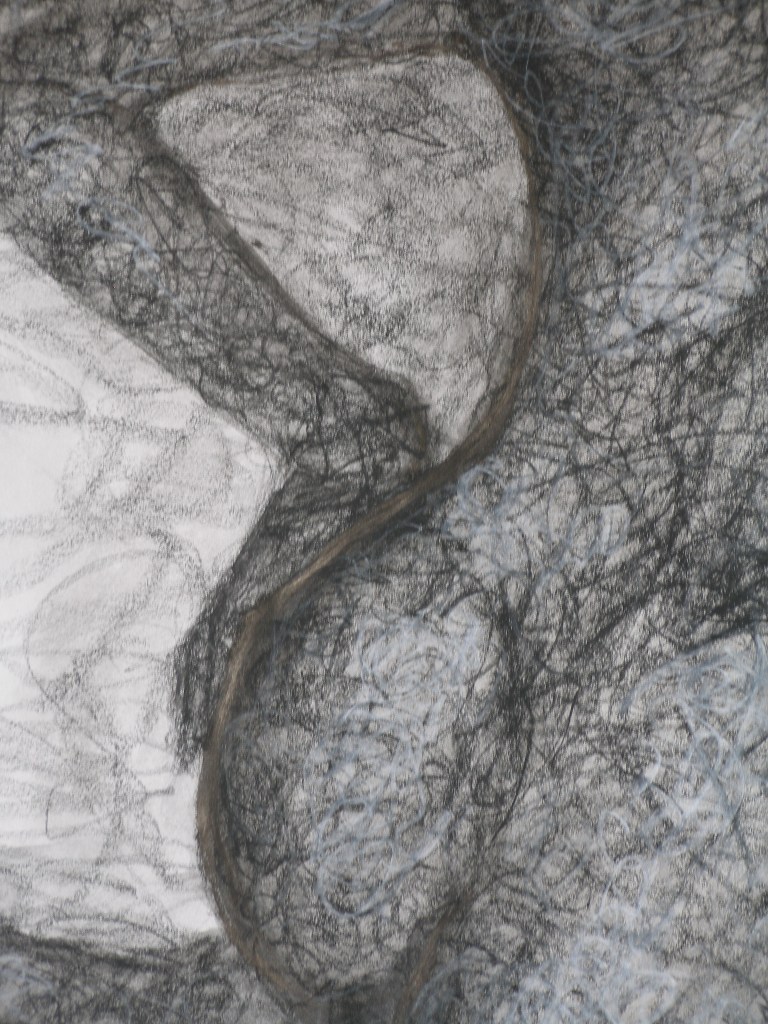
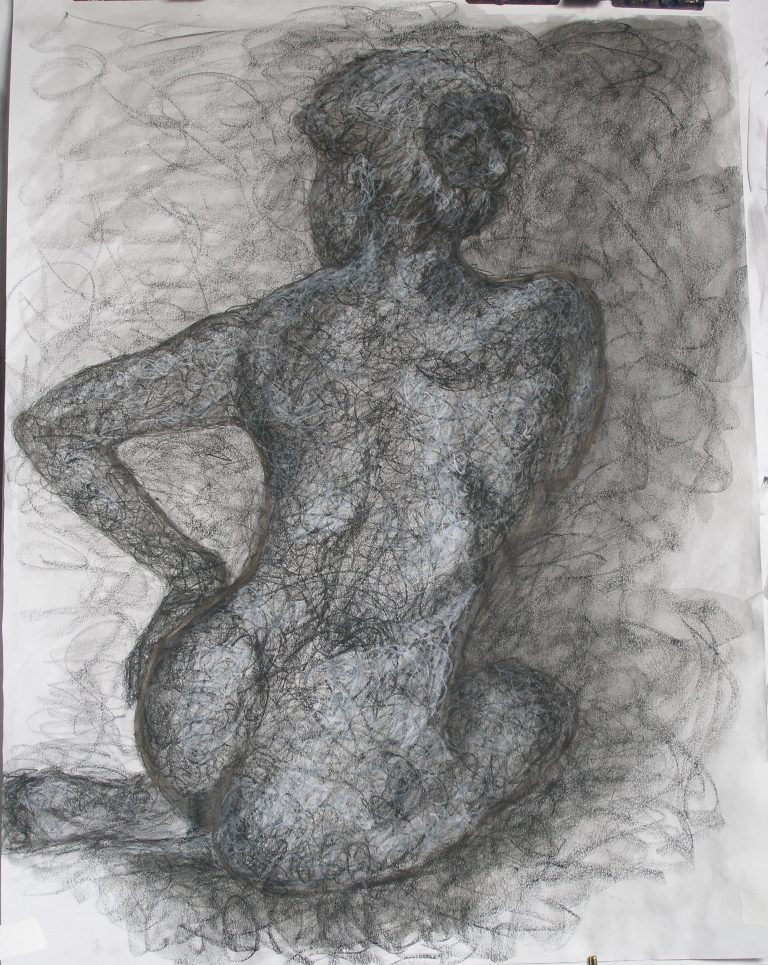
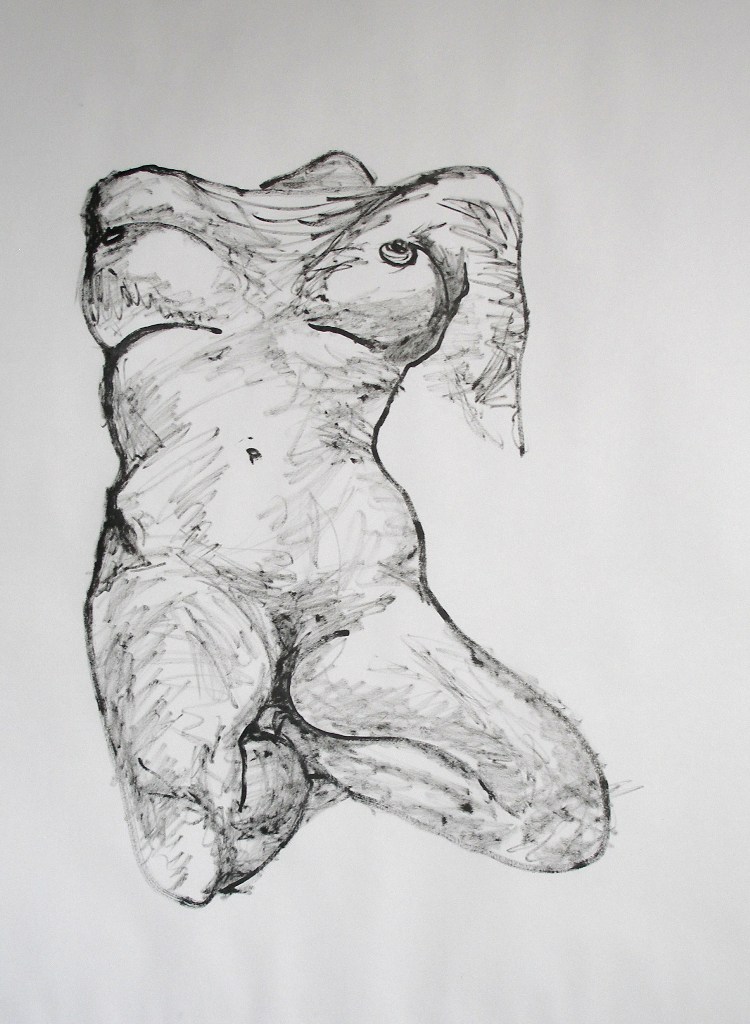
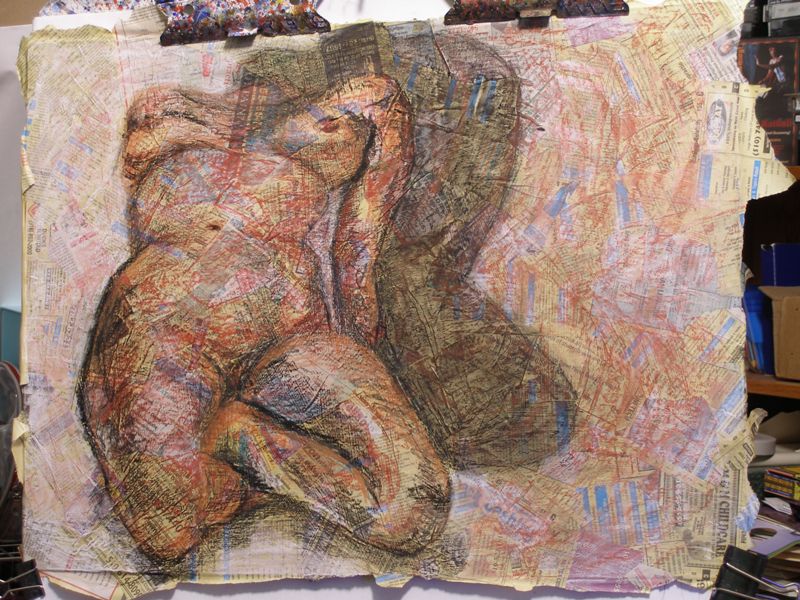
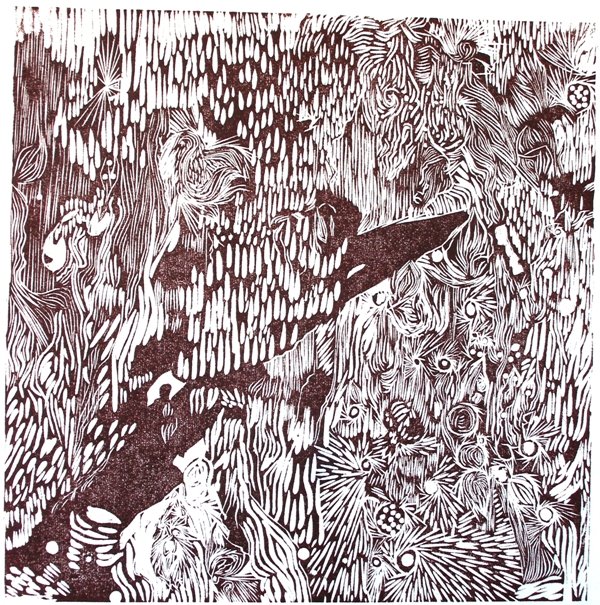
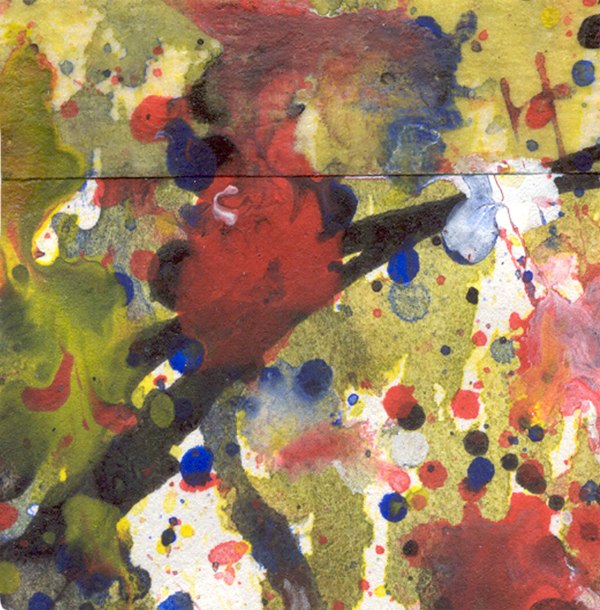
I worked a little more on one of the drawings I posted previously. I took charcoal and added texture to the drawing. I emphasized contour line in it with a Japanese calligraphy pen (it's like a fountain pen except it has a true brush for the nib).

Sunday, November 19, 2006

Recent Works


Here are a couple of figure drawing I did this week. I used ink and brush to draw them.

Click on the image if you want to see it larger. Use your browser's back button/arrow to get back to the blog.

Saturday, November 11, 2006

Dia de los Muertos 2


I will post pictures from one of the altars at the Space 15 event. I appologize for not having the names of the alatristas and artists involved as there were few names posted...it was a very "organic" show.

If you are one of the altarista/artists please post your comments here and tell us about your work!

~PPC~

Thursday, November 09, 2006

Dia de los Muertos


These are a few pics from the Day of the Dead show over the weekend. The "Venus at her Toilet" images are the vignette I installed. It's based on a painting of the same name by Diego Velasquez. The last one is an image of an artwork that was hanging around...

As always click an image to see it bigger, use your browser back button/arrow to get back to this blog.

Wednesday, November 08, 2006

Some Projects and an Event


Here are some art projects I did this past week. I will also be posting pictures throughout the week from an art event I participated in last week for Dia de los Muertos. Since I can only post a five pics at a time I will stretch the pics out over several blog entries. This event was an exhibit of art installations and artworks in the theme of the Day of the Dead...but that will come later. Today I will post a nude drawn with charcoal, conte and grease pencil on a collage and a little book I made for my bookarts class. I will show the cover of the book, a couple of inner spreads and a distance shot of the book opened up. It's not perfect, there are bugs to be worked out, but it's not bad for my first attempt to make a 3-D book.

Saturday, October 28, 2006

Autmn Follies The first five spreads


I'm posting these in spreads so you can see how it would look as the book is opened. Unfortunately I've not figured out how to get the images to publish in the order I want them in, I even tried using sequetial file names but that trick didn't work...oh well I hope you all enjoyed my little book...I'm having fun in this class and there is sooooo much cool stuff I'm learning.

Each sheet of Masa paper is 20" x 8". I formatted each sheet in Microsoft publisher so it would print the graphic for one page and the text for the following page. Each sheet is folded in half with the folded edge to the outside, meaning it is the edge you will turn as you open the pages. The two edges of each sheet that were folded together were bound within the stitces. I printed 8 sheets that folded and bound made up 16 pages.

The rest of the book is in the next/previous post. Remember, as always you can click on an image to see a larger view, when done looking at it use your browser's back button to get back to the blog. ~PPC~

Autmn Follies


Since some have expressed interest I've JPGed the book pages. They are going to cross a couple of posts as I can only upload 5 images at a time...

Everything was jet printed on Masa paper. It is heavy enough to be pulled through the printer's rollers and one side has a smooth surface that doesn't bleed when printed. It's also a fine paper and is archival. The cover is a rare paper that has been in my paper files for about 15 years waiting for me to figure out what I was going to do with. At first I was going to make this a 2 book edition but decided since I have half a sheet of the cover paper left I may as well use it to cover two more books. After that - that's it, it's also a very expensive paper and I'm not buying more....

Friday, October 27, 2006

BookArts Midterm


I've been working on my midterm in my bookarts class. I did a stab bound book with some woodcuts printed over digital printouts. The above pictures are links to a larger view. I included the text that accompanies the woodcut in the book and a jpg of the book's cover. Enjoy!

Friday, September 08, 2006

Absense


Sorry I've not posted for quite some time. My mother was hospitalized and I rushed to Texas just in time to see her before she passed on. I've spent the past weeks helping my Sister to go through Mom's stuff. That is a most difficult duty to say the least and I don't envy my sister who has so much more stuff to go through. We only got about half way through Mom's household stuff from Japan that she put into storage 5 years ago when she returned to the U.S. after my father's death. I hated to leave Sis with so much to go through but I started classes this week and had to return home. It's hard to make art in someone else's home and I really needed to prepare my studio for the new semester. Believe me if I could have stayed I would have, especially since I will miss my grandson's birthday party tomorrow!

I didn't get any art done while I was gone, but I did get to spend some quality time with my son and grandson. In order to keep with the art theme of this blog I will post some images take by my sister's boyfriend Lee.

Lee is a professional videographer and talented photographer. I'm posting a photo he took of my son on his motorcycle. It is a beautiful freeze of the bike zooming down my Sister's street. The stop action is why Chris and the bike are so clear while the background is fuzzy. The second photo is a zoomed in crop of the chrome area near the footpedal in the same photo. Note how clear that reflected house is in the chrome, it almost looks painted on... Any of you who are photographers will appreciate this, it only took 9 stop action shots of that bike going by to get this one very clear pic (although the others are very clear the angle isn't good enough to see the reflections clearly). Remember, you can click on the photos to see them enlarged in another window.

The next post will be about the books I'm about to make in my "Book Arts" class. ~PPC~

Sunday, August 13, 2006

More Red Dragon


This is how my first experiment with printing the woodcut onto a digital printout came out. Dont forget you can click on the images in this blog to view them enlarged. I scanned a 1"x1" peice of a drip painting and enlarged it to 12"x12". I went to Kinkos and had them printed with a plotter; a couple of grayscale and a couple of full color. I used the full color as a roadmap for the chine colle in my previous posting. I used a grayscale printout as a roadmap for carving the woodcut. I then inked the woodcut block with brick red ink and printed it on white mulberry paper, green drawing paper and onto one of the full color digital printouts. I really like the looks of the block printed onto the digital printout. I think I will do an edition of these. I just have to decide if I will do 25 or 50. The nice thing is that I don't have to do them all at once (plotter printouts are $10 a square foot). I can do a few as I need them. I think I may also want to print a layer of clear acrylic gel medium over the printout before I print with oily ink on top of it. I'm not sure if these papers are archival, but acrylic medium neutralizes ph and will provide a barrier between the paper and the oil based ink. Oil based mediums can deteriorate even good paper but a buffer of acrylic will protect the paper. I am very pleased with how this one came out! ~ PPC ~

Thursday, August 03, 2006

Red Dragon Surfing Chine Colle


This is a 12x12" chine colle I made using the 1x1" clip from a color drip painting. Chine colle is a form of printmaking where peices of paper are fused together by running them through a printing press (with watered down acid free pva glue providing extra adhesion). I've also carved a woodblock that I plan to print over this. I plan on experimenting with different colors of ink till I find the one color I want to use. I want it to be cohesive with the chine colled papers and yet be distinctive. How do I experiment with a one of a kind you ask...well I've printed a scan of the image several times on a color plotter. I've printed the block on top of the digital printout...which will become another type of print edition. I've also printed the block on top of a digital printout of the 1x1" clipping. The size of the image on the printouts and the block are 12x12" I suspect the most successful color for the block printed portion will be a chromatic gray of burgandy, navy and gold. We'll see...PPC

Tuesday, August 01, 2006

Studio Maintenance


Well it’s that time of year, the annual studio sweep; gotta do it a little earlier this year. One because it’s getting difficult to find anything.. two because my son is visiting in September and three because the new school semester starts in September and most of all because I have to get my year of the dog postcards printed so I can return Carol’s etching press to her.; which will make room for the fall semester’s class projects (though it would be nice to have a press for my next class it’s not necessary).

I’m kind of excited about organizing my studio this year. I actually spent some $$$ on storage tools, I say tools because they do more than simply house stuff. I found some neat gadgets at a crafter’s chain store (Michael’s) that promise to be really handy.

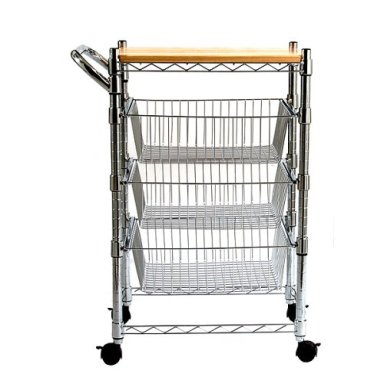
One of the items is a rolling kitchen cart with 3 baskets on drawer glides. I like this because I can put project stuff in it and roll it around from studio to kitchen sink to proofing press to the deck to the couch to home office and back into the studio. I’ll use this for projects in progress, the cart has a table top to work on, and the drawers will be nice to organize project materials and tools right at hand, no matter what room I’m working in. I actually bought this item at Target, pretty reasonably priced too.

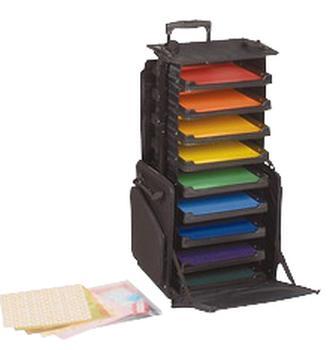
The coolest item from Michaels is a Paper Tote. Man is this awesome! It’s made for scrapbookers but it can be used for any craft or art that is paper based. It is this compact little suitcase on wheels that closed is about 20 x 19 x 15”. But when you open it the amazing thing is that it pops up to bout (my) waist high and there you will see the how handy it is when you see the large shelves for storing paper and a top shelf that doubles as a table top. For next semester I’m going to use to house decorative papers for class. But left open it could be used to dry prints!

The other item I purchased is another wheeled tote that is about the same size as the above item. It has all these amazing attachments that Velcro into the thing that store supplies, little pouches, brush/pencil/cutting tool organizers and a multitude of pockets with more removable pouches Velcroed into every nook, cranny and pocket in the thing. This is great for storing stuff and having it not rattle and mingle all over the place during travel. Honestly I had to get two, one for my woodblock carving and bookarts tools and the other for my plein air painting and drawing tools (the one for drawing has vertical pocket that will be handy for separating small wet paintings). The wheels and telescoping handle are sturdy enough that I can bungie my stool and field easal to it then roll all in one into rough terrain. Gasp! Now I have no excuse for not painting outdoors…oh yeah--wait a minute--who has time with a full time day job and masters studies…whew I have a reasonable excuse.

Well enough typing for today; I’ve real work to do…I’ll be back when I think I might have something to say. PPC

Wednesday, July 26, 2006

Big Ass Spyder


So I've finally done it, I've joined the blogging bandwagon. I think it's a great idea for an artist's journal and I can refer back to it from time time when the muse is on vacation.

Today, just to get started, I've posted one of my artworks. It's a reduction woodcut done in 5 stages. The paper size is about 22" x 30" which is a full sheet of Rives BFK there is a deckled edge all around. The image is about 20 x 20" and is printed at the top of the sheet.

The muse for this woodcut came from an 18 x 24" drip painting that was cut up into 1 x 2" and 2 x 2" peices. This is a blow up of one of the 2 x 2" bits. I scanned the little peice, printed it out really big, transfered it to a sheet of baltic birch plywood then started carving. The transfered image was only a roadmap, I took many side journeys in the carving of this peice and as usual, the cutmarks are an integral part of the final image. I've been working in this manner off and on, cutting up splatters and making abstract paintings or prints from them. And so, since most of these studies are mostly created by the universe, I refer to this method as " My Zen Series."

I'll tune back in soon, hopefully this journal will improve with time and blogging experience...PPC